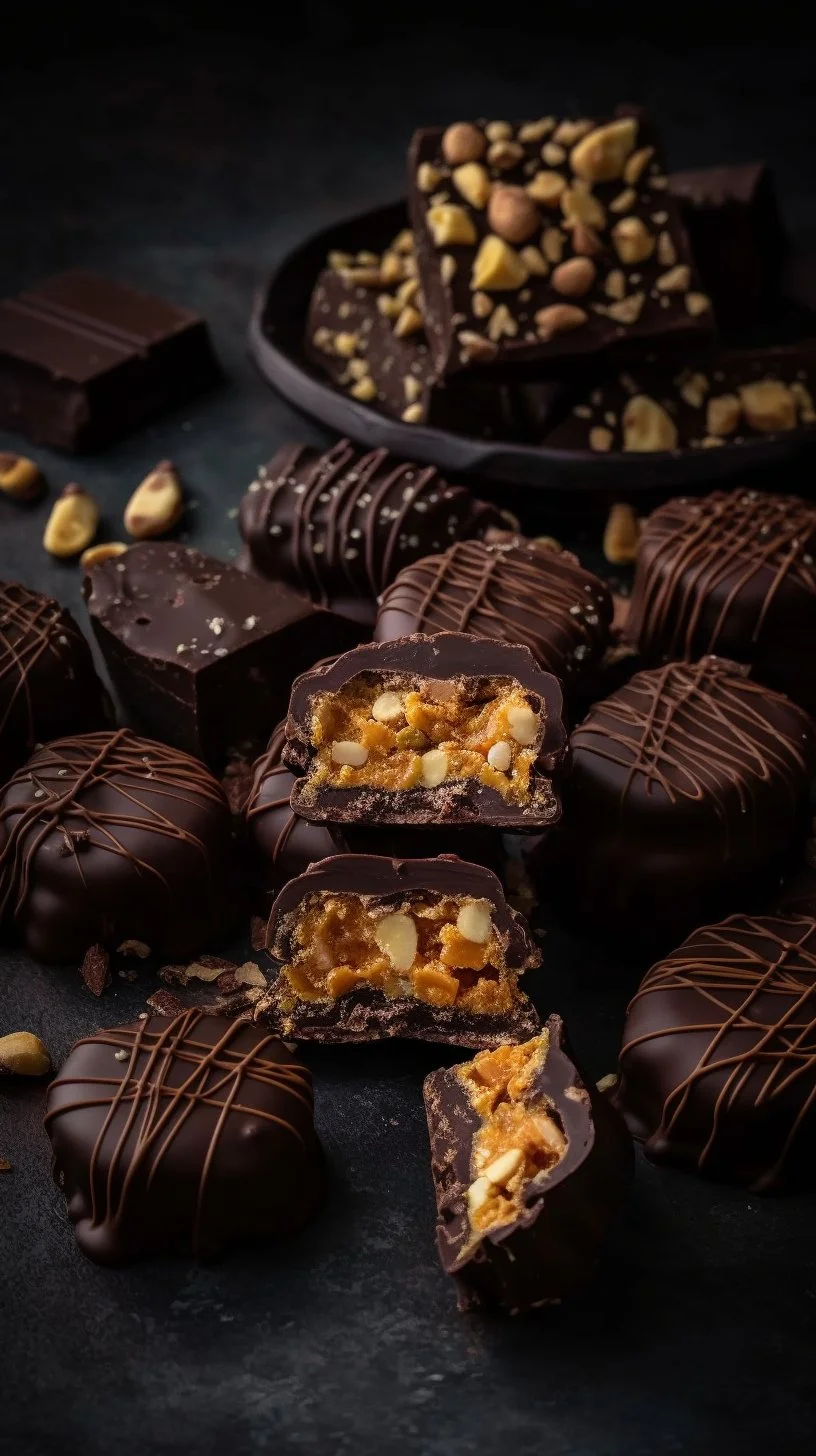
Homemade Butterfinger Bars are like little nuggets of nostalgia, reminiscent of childhood favorites, yet crafted with wholesome ingredients that make each bite even better. As you savor the satisfying crunch of cornflakes paired with the silkiness of rich chocolate, it’s hard not to smile and feel transported back to simpler times. This simple yet delightful recipe is all about recreating that beloved candy-bar goodness right in your own kitchen, giving you the power to indulge with a touch of health and love.
Why make this recipe? For those moments when you want something sweet but healthier, these Homemade Butterfinger Bars hit the spot! Perfect as an after-school snack, a cozy treat for movie night, or a sweet surprise to share with friends, these bars are not just a dessert; they’re a celebration. Plus, embracing the art of making your own treats helps you control the ingredients and customize flavors to your heart’s content.
How to make Homemade Butterfinger Bars
Ingredients:
- 3 cups crushed cornflakes
- 1 ½ cup natural crunchy peanut butter
- ½ cup agave, maple syrup, or honey
- 1 teaspoon vanilla extract
- ⅓ cup granulated sugar, coconut sugar, or a sugar alternative
- ½ teaspoon salt
- 12 oz dark or semisweet chocolate
- 2-3 teaspoons coconut oil
Directions:
- In a large mixing bowl, whisk together the peanut butter, agave, vanilla, sugar, and salt. The mixture should be smooth and inviting, a creamy dream infused with sweetness.
- Add the crushed cornflakes to your peanut butter concoction and stir well, ensuring the crispies are enveloped in that delicious blend.
- Line an 8×8-inch pan with parchment paper, creating a little haven for your bars. Spread the cornflake and peanut butter mixture evenly into the pan, pressing it down firmly to create a solid base.
- Pop the pan into the freezer for about 4 hours—or leave it overnight for perfect firmness.
- Once frozen, remove the slab from the pan and slice it into 18 rectangular bars. Return them to the freezer immediately; we want them nice and chilly for the chocolate coating.
- Melt the chocolate with coconut oil using a double boiler or by microwaving in 30-second intervals, stirring in between until luscious and smooth.
- Using two forks, dip each bar into the melted chocolate, ensuring a good coat and letting the excess drizzle back into the bowl. Transfer each finished bar to a parchment paper-lined tray.
- Pop the tray back into the freezer for about 30 minutes, allowing the chocolate to firm up beautifully. And just like that, you’re ready to enjoy!
How to serve Homemade Butterfinger Bars? These delightful bars are fantastic on their own but can shine even brighter when served with a glass of chilled almond milk, a scoop of your favorite ice cream, or even an espresso for that perfect afternoon pick-me-up.
How to store Homemade Butterfinger Bars? Keep these treats fresh by storing them in an airtight container in the freezer. They’ll maintain their delightful crunch and flavor easily for up to a month—if they last that long!
Tips to make Homemade Butterfinger Bars:
- For an added layer of flavor, try drizzling some extra melted chocolate on top of each bar before they set.
- If you prefer a sweeter or healthier option, feel free to adjust the level of sweetener used based on your taste.
- Consider adding a sprinkle of sea salt on top of the chocolate-coated bars for a sweet-and-salty contrast that enhances every bite.
Variations:
- Swap out crunchy peanut butter for almond butter or cashew butter if you’re looking for a different nutty flavor.
- For a fun twist, mix in some mini chocolate chips or dried fruit into the cornflake mixture for added texture and sweetness.
FAQs:
Q: Can I use a different type of cornflake?
A: Absolutely! You can experiment with different types of cornflakes, or even gluten-free options if needed. Just ensure they’re crispy for that perfect crunch.
Q: How do I make these bars vegan?
A: To make these bars vegan, simply use maple syrup or agave as the sweetener and ensure your chocolate is dairy-free. It’s an easy swap that keeps them delicious!
Q: Can I make these without a freezer?
A: While the freezing step is essential for setting the bars, if you’re short on time, you can chill them in the refrigerator, though they may be a little softer.
Dive into this sweet adventure of making Homemade Butterfinger Bars and enjoy every moment of the process. Cooking is a beautiful journey filled with delightful flavors and heartwarming memories, and with this recipe, you can create something both healthful and indulgent! So roll up your sleeves and let the kitchen festivities begin. You’re one step closer to your very own candy-bar haven. Happy cooking!
Homemade Butterfinger Bars
Ingredients
Method
- In a large mixing bowl, whisk together the peanut butter, agave, vanilla, sugar, and salt until smooth.
- Add the crushed cornflakes to the mixture and stir well until evenly coated.
- Line an 8x8-inch pan with parchment paper and spread the cornflake mixture evenly, pressing down firmly.
- Pop the pan into the freezer for about 4 hours or overnight for optimal firmness.
- Once frozen, remove the slab from the pan and slice it into 18 bars.
- Melt the chocolate with coconut oil using a double boiler or microwave in intervals, stirring until smooth.
- Using two forks, dip each bar into the chocolate and allow excess to drip back into the bowl.
- Transfer bars to a parchment-lined tray and return to the freezer for about 30 minutes to set.