A slow evening light pours across the counter as I slice through a satin layer of chocolate cake, the knife catching a whisper of peanut butter on the way. This trifle is the kind of dessert that holds a story — warm, a little nostalgic, and wildly comforting in every creamy spoonful. It’s a layered escape: rich, sweet, and impossibly simple.
Why make this recipe
Because it turns pantry staples into a dramatic, shareable centerpiece that tastes like celebration. The interplay of bittersweet chocolate, silky peanut butter, and ripe banana is both familiar and unexpectedly cinematic — perfect for family gatherings, date nights, or any time you want dessert to feel intentionally joyful. It’s forgiving, fast to assemble, and beautiful to serve.
How to make Chocolate Peanut Butter Banana Cream Trifle
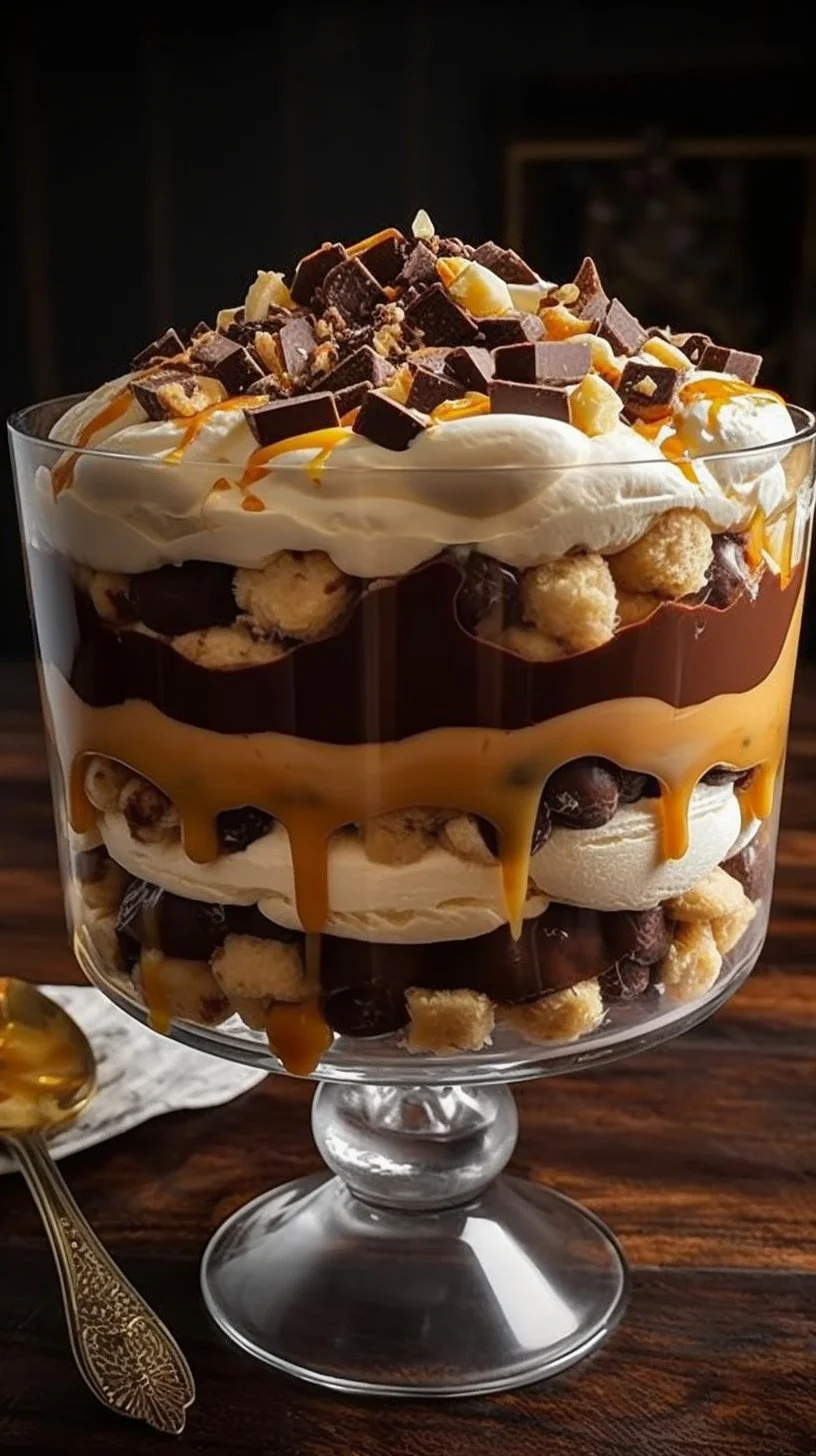
Think of this trifle as a short film in edible form: a base of tender chocolate cake, a buttery, nutty middle, and airy clouds of whipped cream punctuated with banana sweetness. Assemble the layers in a clear trifle dish so every strip of chocolate and curve of banana becomes part of the visual story. Chill to let the flavors marry, then slice through the glass and watch the layers give way in perfect contrast.
Ingredients:
- Chocolate cake
- Peanut butter
- Bananas, sliced
- Whipped cream
- Chocolate shavings (optional)
Directions:
- Bake a chocolate cake according to package instructions and let it cool.
- Slice the cooled chocolate cake into layers.
- In a trifle dish, layer chocolate cake, peanut butter, banana slices, and whipped cream.
- Repeat the layers until all ingredients are used, finishing with whipped cream on top.
- Garnish with chocolate shavings if desired.
- Chill in the refrigerator for at least 1 hour before serving.
How to serve Chocolate Peanut Butter Banana Cream Trifle
Serve chilled, with a long spoon to scoop down through every layer so each bite carries cake, peanut butter, banana, and cream together. For an elegant touch, add extra chocolate shavings or a light dusting of cocoa on top. Pair with strong coffee or a black tea to balance the sweetness, or set it out family-style so guests can help themselves to generous portions.
How to store Chocolate Peanut Butter Banana Cream Trifle
Cover the trifle dish with plastic wrap or a tight-fitting lid and keep refrigerated. It’s best eaten within 48 hours — the bananas will stay pleasantly tender for a day or two, but they’ll start to brown and soften after that. If you need to keep components longer, store cake and whipped cream separately and assemble just before serving.
Tips to make Chocolate Peanut Butter Banana Cream Trifle
- Use slightly underripe bananas for firm slices that hold up in layers.
- Warm the peanut butter briefly to make it easier to spread or dollop between layers.
- For lighter texture, fold a bit of whipped cream into creamy peanut butter before layering.
- Chill the cake layers before assembling to help the trifle set evenly.
- If you prefer a crunch, add chopped roasted peanuts or crushed cookies between layers.
Variations (if any)
- Swap peanut butter for almond butter or Nutella for a different nutty or hazelnut profile.
- Make it gluten-free by using a GF chocolate cake or brownies.
- Add a layer of caramel or dulce de leche for a salted-caramel twist.
- Turn it into single-serve parfaits in small glasses for an elegant presentation.
FAQs
Q: Can I use store-bought whipped cream?
A: Yes — store-bought whipped topping works fine for quick assembly. For the best texture and flavor, freshly whipped cream sweetened lightly with powdered sugar is ideal.
Q: Can I make this ahead of time?
A: You can assemble the trifle several hours before serving and chill it for up to 24–48 hours. For the freshest banana slices, assemble no more than a day ahead or toss banana slices with a little lemon juice to slow browning.
Q: How can I prevent the bananas from turning brown?
A: Brush the banana slices lightly with lemon or orange juice to slow oxidation, or add them as the final layer just before serving.
Q: Is this recipe easily scaled up for a crowd?
A: Absolutely. Use a larger trifle bowl or multiple dishes to feed more people — the layering technique stays the same.
Q: Can I make this dairy-free or vegan?
A: Substitute whipped coconut cream for whipped cream and use a dairy-free chocolate cake. Also choose a vegan-friendly peanut butter.
Conclusion
If you’d like inspiration for a gluten-free and dairy-free version packed with the same bold flavors, this take on the Chocolate Peanut Butter Banana Trifle is a thoughtful reference: Chocolate Peanut Butter Banana Trifle – Unconventional Baker. For a quick, kitchen-friendly guide and another classic riff on chocolate-banana parfaits, see this helpful recipe roundup: Chocolate-Banana Cream Trifle – Recipes | Pampered Chef US Site.
Layer, chill, slice, and savor — may every spoonful feel like a small celebration you made with love.

Chocolate Peanut Butter Banana Cream Trifle
Ingredients
Method
- Bake the chocolate cake according to package instructions and let it cool.
- Slice the cooled chocolate cake into layers.
- In a trifle dish, layer chocolate cake, peanut butter, banana slices, and whipped cream.
- Repeat the layers until all ingredients are used, finishing with whipped cream on top.
- Garnish with chocolate shavings if desired.
- Chill in the refrigerator for at least 1 hour before serving.