
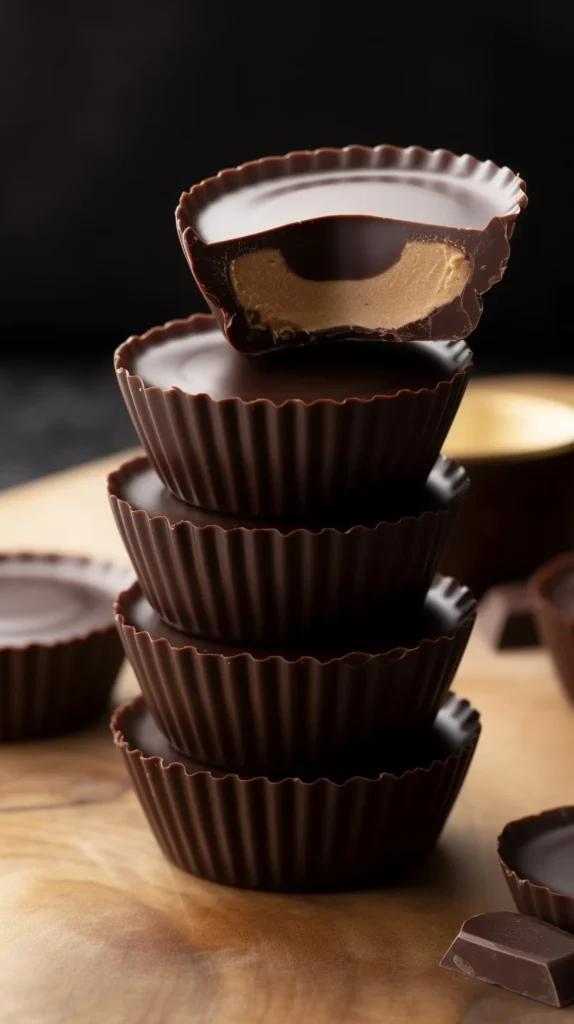
A dusty market in Marrakech. A rainy alley in Seoul. Somewhere between those streets lives the tiny golden thrill called a Peanut Butter Cup — simple, bold, and dangerously portable. Take one bite and you’re on a sweet, salty, cinematic detour.
Why make this recipe
Because some recipes are passports: they carry comfort from childhood, spice from the street, and the kind of handmade polish store-bought treats can’t touch. These cups are quick, customizable, and they travel well — perfect for gifting, snacking, or pretending you were raised by a chocolate artisan.
How to make Peanut Butter Cups
This is a small, hands-on production: a crunchy graham base, a pillowy peanut butter center, and two layers of chocolate that hug each bite. It’s part candy, part ritual — and absolutely worth the fridge wait.
Ingredients:
- 3/4 cup graham cracker crumbs
- 1/2 cup powdered sugar
- 3 ounces smooth peanut butter (approx. 1/3 cup)
- 1 tablespoon unsalted butter
- 7 ounces semi-sweet chocolate chips
- 1/4 cup plus 1 tablespoon unsalted butter
- 5 ounces semi-sweet chocolate chips
- 1/4 cup plus 1 tablespoon unsalted butter
Directions:
- Prep a 12-tin muffin tray with liners.
- Combine graham cracker crumbs and powdered sugar in a bowl and set aside.
- In a heat-safe bowl, melt peanut butter and unsalted butter together until smooth over low heat.
- Add the graham cracker crumb mixture and stir until combined, forming a dry crumbly texture.
- Divide into 12 balls, flatten into patties, and set aside.
- Melt 7 ounces of chocolate chips with 1/4 cup plus 1 tablespoon butter until smooth.
- Scoop 1 tablespoon of melted chocolate into each muffin cup, pulling it up halfway on the sides.
- Place in the fridge for about 10 minutes to cool.
- Drop a peanut butter patty into each cup.
- Melt the remaining 5 ounces of chocolate chips and 1/4 cup plus 1 tablespoon butter until smooth.
- Spoon 1 1/2 tablespoons on top of each peanut butter layer.
- Place in the fridge to set for 2-4 hours.
- Store at room temperature for up to 2 weeks or refrigerate for slightly longer. To freeze, store in a freezer-safe container or bag for up to 3 months.
How to serve Peanut Butter Cups
Serve at room temperature if you want that yielding, creamy chew; chill them for a crisp snap. Plate them like little comets — a dusting of flaky sea salt or a streak of melted chocolate across a small plate makes each one feel like a street-side delicacy in a midnight food market.
How to store Peanut Butter Cups
Wrapped in parchment or stacked in an airtight tin, they’ll be content on your counter for about two weeks. For a touch more longevity (and a firmer bite), keep them refrigerated up to a month. Freeze in layers with parchment between rounds for up to 3 months — thaw at room temp before serving.
Tips to make Peanut Butter Cups
- Use smooth peanut butter for the silkiest centers; if you love texture, swap half for crunchy.
- Melt chocolate gently over low heat or in short microwave bursts to avoid seizing.
- Warm the peanut butter slightly before shaping patties so they compress neatly without crumbling.
- Line your tin well — foil or sturdy paper liners make unmolding easier and more dramatic.
- Tempering isn’t required, but stirring in a little melted butter (as this recipe does) helps shine and stability.
Variations (if any)
- Salted Caramel Twist: Add a thin layer of soft caramel between the peanut patty and the top chocolate.
- Miso Peanut Butter Cups: Stir a teaspoon of white miso into the peanut butter for umami depth (think Tokyo street-sweets).
- Coconut Crunch: Mix toasted shredded coconut into the graham base for a tropical snap.
- Dark & Chili: Use dark chocolate and a pinch of cayenne to channel Mexico City street-vending vibes.
FAQs
Q: Can I use natural peanut butter?
A: You can, but natural separates. Stir it until smooth and consider chilling the patties slightly longer so they hold shape when you add chocolate.
Q: Do I have to use graham cracker crumbs?
A: No — substitute digestive biscuits, tea biscuits, or even Oreo crumbs (for a chocolatey crust) to localize the flavor to your street-food mood.
Q: How do I keep the cups from sticking to liners?
A: Use sturdier foil liners or a light spray of oil. Let the chocolate fully set before removing; brief minutes in the freezer will help release them cleanly.
Q: Can I make these nut-free?
A: Yes — swap the peanut butter for sunflower butter or cookie butter, and check labels on other ingredients for nut contamination.
Q: How can I prevent the chocolate from blooming (white streaks)?
A: Bloom is cosmetic — keep them cool and airtight. If you want glossy finishes, temper chocolate or ensure your butter-to-chocolate ratio is correct as in this recipe.
Conclusion
Take these cups on a tiny global tour: a graham base that whispers New England picnics, a peanut heart that nods to Southern comfort, and chocolate that could belong to any bustling night market. For a more elaborate from-scratch approach and step photos, check out this Homemade Peanut Butter Cups recipe at Fifteen Spatulas. If you’re feeling adventurous and want to try an umami twist, see the creative Miso Peanut Butter Cups inspiration at Gastroplant.
Peanut Butter Cups
Ingredients
Method
- Prep a 12-tin muffin tray with liners.
- Combine graham cracker crumbs and powdered sugar in a bowl and set aside.
- In a heat-safe bowl, melt peanut butter and unsalted butter together until smooth over low heat.
- Add the graham cracker crumb mixture and stir until combined, forming a dry crumbly texture.
- Divide into 12 balls, flatten into patties, and set aside.
- Melt 7 ounces of chocolate chips with 1/4 cup plus 1 tablespoon butter until smooth.
- Scoop 1 tablespoon of melted chocolate into each muffin cup, pulling it up halfway on the sides.
- Place in the fridge for about 10 minutes to cool.
- Drop a peanut butter patty into each cup.
- Melt the remaining 5 ounces of chocolate chips and 1/4 cup plus 1 tablespoon butter until smooth.
- Spoon 1 1/2 tablespoons on top of each peanut butter layer.
- Place in the fridge to set for 2-4 hours.