
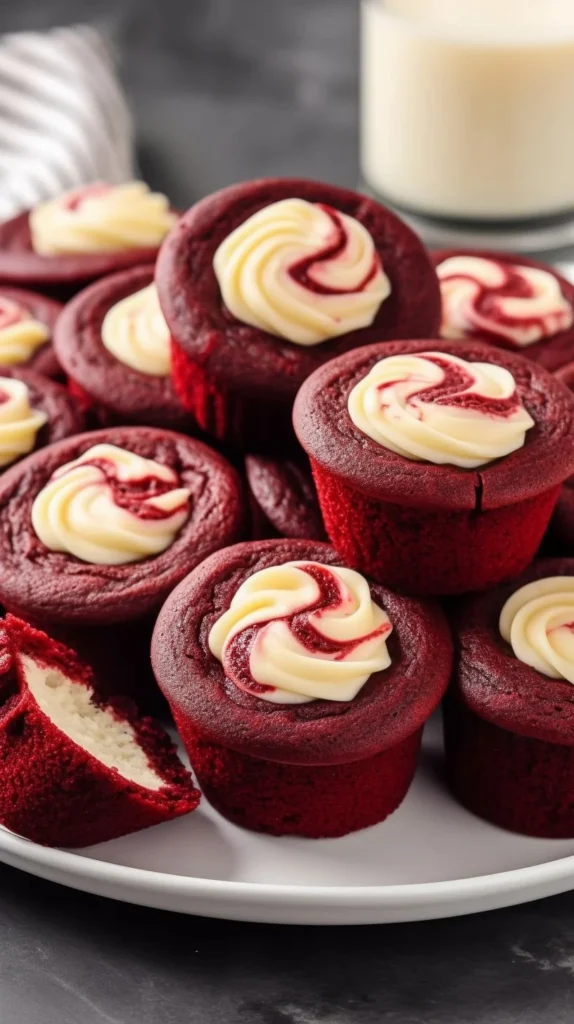
There’s something about a small, crimson bite wrapped in a cream-cheese cloud that takes me back to my mama’s kitchen on slow Sunday afternoons. These mini red velvet cheesecakes feel like a soft hug—comforting, a little fancy, and full of memories. Pull up a chair, and let’s make something sweet together.
Why make this recipe
This recipe turns two beloved classics—red velvet cake and cheesecake—into tidy little bites that are perfect for potlucks, porch sittin’, or when you want a sweet taste without a big fuss. They bake quickly, share easily, and carry that gentle, nostalgic flavor that always brings folks around the table.
How to make Mini Red Velvet Cheesecake
Start by setting the oven to 350°F and preparing your mini muffin pan so nothing sticks; these bite-size treats come together fast, so have your bowls ready. You’ll make a simple red velvet base, a smooth cream cheese center, and then sandwich them gently in the pan. Bake until just set, let them cool slowly, and you’ll have tender little cakes with a silky middle.
Ingredients:
- 1 cup all purpose flour
- 1/4 cup unsweetened cocoa powder
- 1 tablespoon unsweetened cocoa powder
- 3/4 cup salted sweet cream butter, melted and cooled
- 1 1/4 cups granulated sugar
- 1 tablespoon red gel food color
- 2 teaspoons pure vanilla extract
- 2 large eggs, room temperature and beaten
- 8 ounces cream cheese, softened
- 1/4 cup granulated sugar
- 1 teaspoon pure vanilla extract
- 1 large egg yolk
Directions:
Preheat the oven to 350 degrees F. Spray a mini muffin pan with nonstick cooking spray and set aside. In a small mixing bowl, whisk together the flour and unsweetened cocoa powder. In a medium bowl, whisk together the melted butter, sugar, red food color, vanilla, and eggs. Stir in the flour mixture until just combined. In another bowl, beat the cream cheese until smooth, then add the sugar and vanilla and mix until combined. Mix in the egg yolk until no streaks remain. Add 1 tablespoon of the red velvet base to the mini muffin pans, then fill with 2 teaspoons of cheesecake filling. Bake for 8 to 9 minutes. Allow to cool for 20 to 30 minutes before transferring to a wire rack to cool completely.
How to serve Mini Red Velvet Cheesecake
Serve these warm or at room temperature on a pretty plate with a dusting of cocoa or a tiny swirl of whipped cream. They’re lovely for afternoon tea, dessert after supper, or tucked into a picnic basket. Little paper liners make them charming and easy to pass around.
How to store Mini Red Velvet Cheesecake
Store cooled cheesecakes in an airtight container in the refrigerator for up to 4 days. For longer keeping, freeze them on a baking sheet until firm and then transfer to a freezer-safe bag for up to 1 month—thaw in the fridge before serving.
Tips to make Mini Red Velvet Cheesecake
- Use room-temperature eggs and cream cheese so your batter is smooth and mixes up evenly.
- Measure flour with a gentle spoon-and-level method to keep the red velvet tender.
- Don’t overfill the muffin wells; the suggested amounts keep the proportions just right.
- Let them cool in the pan for a bit, then move to a wire rack—rushing this can cause the centers to crack.
- If you like a little extra tang, add a teaspoon of lemon juice to the cheesecake filling.
Variations (if any)
- Chocolate lovers can stir a pinch more cocoa into the red base for deeper chocolate flavor.
- Top with a small dollop of mascarpone sweetened with a touch of powdered sugar.
- For a festive touch, sprinkle crushed pecans or a few chocolate shavings on top before serving.
FAQs
Q: Can I make the red velvet base ahead of time?
A: Yes — you can make the red velvet batter and keep it covered in the fridge for a day. Gently rewhisk before using.
Q: My cheesecakes cracked—what happened?
A: Cracking often comes from overbaking or baking at too high a temperature. These are small and set quickly, so watch them closely and remove when centers are just set.
Q: Can I use regular liquid food coloring instead of gel?
A: You can, but gel gives that rich red color without adding too much liquid. If you use liquid, use a touch more and be mindful of batter consistency.
Q: How many mini cheesecakes does this recipe make?
A: It depends on your mini muffin pan size, but typically you’ll get around 24 bite-size cheesecakes.
Q: Can I double the recipe?
A: Absolutely—just mix in a larger bowl and bake in batches or use two pans at once if your oven fits them comfortably.
Conclusion
If you’d like to compare notes or see another cozy twist on these little treats, I love the way Baked by Rachel’s Mini Red Velvet Cheesecakes presents them, and there’s another lovely version at The Girl Who Ate Everything’s Mini Red Velvet Cheesecakes. Come back and tell me how yours turned out—there’s nothing sweeter than sharing recipes and memories from a warm kitchen.
Mini Red Velvet Cheesecakes
Ingredients
Method
- Preheat the oven to 350 degrees F. Spray a mini muffin pan with nonstick cooking spray and set aside.
- In a small mixing bowl, whisk together the flour and unsweetened cocoa powder.
- In a medium bowl, whisk together the melted butter, sugar, red food color, vanilla, and eggs.
- Stir in the flour mixture until just combined.
- In another bowl, beat the cream cheese until smooth, then add the sugar and vanilla and mix until combined.
- Mix in the egg yolk until no streaks remain.
- Add 1 tablespoon of the red velvet base to the mini muffin pans, then fill with 2 teaspoons of cheesecake filling.
- Bake for 8 to 9 minutes.
- Allow to cool for 20 to 30 minutes before transferring to a wire rack to cool completely.