Fried chicken is more than just food—it’s a crispy, juicy masterpiece that brings comfort and joy to the table. From the savory aroma of seasoned flour to the satisfying crunch of that first bite, making fried chicken at home is a journey worth taking. This article will guide you step-by-step through how to make perfect fried chicken, covering everything from choosing the right chicken to nailing the frying process. Whether you’re a first-timer or a seasoned cook, you’ll learn the secrets to creating golden, crispy, and irresistibly delicious fried chicken. Let’s dive in!
Understanding the Essentials of Perfect Fried Chicken
What Makes Fried Chicken Perfect?
Perfect fried chicken is a harmony of flavor, texture, and balance. The crispy chicken exterior, seasoned to perfection, must crackle under the fork without feeling greasy. Meanwhile, the inside should be juicy, tender, and bursting with flavor. Achieving this balance depends on the right combination of ingredients, proper preparation, and flawless execution.
The Role of Ingredients in Flavor and Texture
Your ingredients are the foundation of success. High-quality chicken ensures tenderness, while spices and seasonings elevate the flavor. Buttermilk, a Southern fried chicken staple, plays a dual role: it tenderizes the meat and helps the coating stick. Flour, cornmeal, or breadcrumbs create the crunchy chicken recipe we all crave, and spices like paprika, garlic powder, and cayenne add a bold punch.
Essential Tools for Cooking Perfect Fried Chicken
No need for fancy gadgets—just the right basics. You’ll need a deep, heavy-bottomed skillet or Dutch oven to maintain steady heat. A thermometer is essential to keep your frying oil at the ideal 350°F. Tongs ensure you don’t damage the coating while flipping, and a wire rack prevents sogginess by allowing air circulation once the chicken is fried.
Key takeaway: mastering fried chicken starts with understanding what makes it perfect: crispy outside, juicy inside, quality ingredients, and the right tools. In the next section, we’ll tackle choosing and prepping your chicken for frying success.
Choosing and Prepping the Chicken
How to Select the Right Chicken Cuts
When making perfect fried chicken, the type of chicken you choose can make or break the dish. Bone-in, skin-on pieces, such as thighs, drumsticks, and wings, are ideal because they retain more moisture and flavor during frying. If you prefer boneless options, opt for chicken tenders or cut breasts into smaller, evenly-sized portions for quicker cooking.
Fresh chicken works best, but frozen chicken is also fine—just be sure it’s completely thawed to ensure even cooking. Organic or free-range chicken often yields a more flavorful result due to better quality and less water content.
Cleaning and Preparing Chicken for Frying
Properly preparing your chicken is key to achieving a tender and juicy interior. Start by rinsing the chicken pieces under cold water, then pat them dry thoroughly with paper towels. Excess moisture can cause the coating to slide off during frying, so this step is non-negotiable.
If you’re aiming for the ultimate crispy chicken, consider scoring the skin slightly or making shallow cuts into the meat. This helps the marinade penetrate deeper and ensures flavorful bites all the way through.
Why Brining or Marinating Matters
To elevate your fried chicken, brine or marinate it for at least 2-4 hours—or even overnight. A buttermilk marinade is a classic choice, as it tenderizes the meat while adding a tangy flavor that complements the spices in the coating. Alternatively, you can use a saltwater brine infused with aromatics like garlic, bay leaves, and peppercorns for a similar effect.
Pro tip: Add spices like paprika, cayenne, or garlic powder directly to the marinade for a head start on seasoning.

Creating the Perfect Coating
How to Mix Your Flour and Spices
The coating is where the magic happens in fried chicken. To create that irresistible crunch, start with all-purpose flour as your base. Mix in cornstarch or rice flour for an extra crispy texture. Season generously with salt, pepper, garlic powder, onion powder, smoked paprika, and a pinch of cayenne.
Want even more flavor? Add dried herbs like oregano or thyme to the flour mixture. Ensure all ingredients are evenly distributed to avoid bland spots in the coating.
The Secret to a Crispy Coating
Double-dipping is the secret weapon for achieving that signature crunchy chicken recipe. After dredging the chicken in the seasoned flour, dip it into a wet ingredient like buttermilk or egg wash, then coat it again with the flour mixture. This double-layer creates a thicker crust that holds up during frying.
Another trick is to press the flour firmly onto the chicken during dredging. This helps the coating adhere better and prevents it from falling off in the oil.
Using Buttermilk or Other Wet Ingredients for Binding
Buttermilk is a fried chicken staple because it binds the flour while adding subtle tanginess. If you’re out of buttermilk, you can substitute it with plain yogurt thinned with milk or even pickle juice for a briny twist.
Consistency is key—your wet mixture should coat the chicken without dripping excessively. This ensures the flour sticks well and forms the crunchy crust we all love in perfect fried chicken.
Frying Techniques and Tips for Perfection
Choosing the Right Oil for Frying
When learning how to make perfect fried chicken, the oil you use is just as important as the chicken itself. Select a neutral, high-smoke-point oil like peanut, canola, or vegetable oil. These oils can withstand high temperatures without burning, ensuring a crisp crust and no unwanted flavors. Avoid olive oil or butter, as they have lower smoke points and can scorch during frying.
Fill your skillet or Dutch oven with enough oil to submerge the chicken about halfway, usually around 2-3 inches. This method, called shallow frying, achieves even cooking while using less oil.
Maintaining the Right Temperature While Frying
Temperature control is critical when frying chicken. Heat your oil to 350°F and monitor it with a thermometer. If the oil gets too hot, the crust may burn before the chicken is cooked through. If it’s too cool, the chicken will absorb excess oil, resulting in a greasy finish.
Fry in small batches to prevent overcrowding, which can lower the oil temperature and make the chicken soggy. Allow the oil to return to 350°F between batches for consistent results.
How Long to Fry for Juicy and Crispy Results
The cooking time for fried chicken depends on the size and type of the pieces. On average, bone-in pieces take about 12-15 minutes per side, while boneless pieces may cook in 8-10 minutes. Use a meat thermometer to ensure the internal temperature reaches 165°F, the USDA-recommended safe minimum.
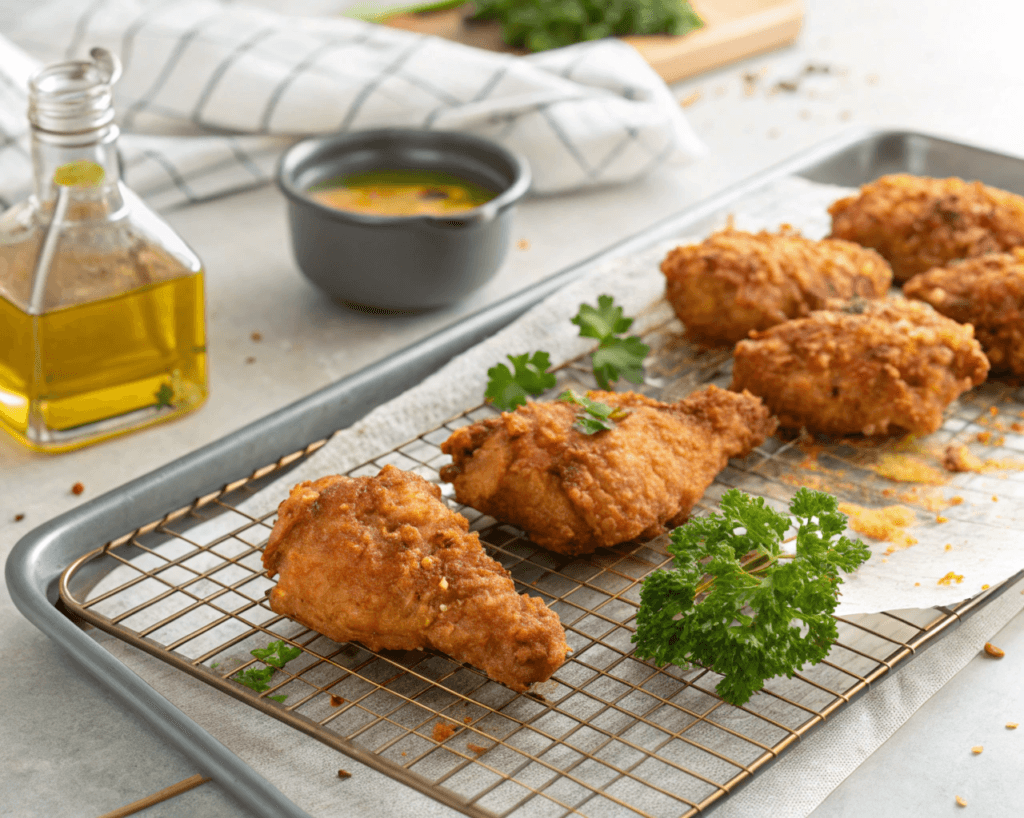
Tips for Avoiding a Greasy Finish
To keep your chicken crispy and grease-free, transfer it to a wire rack set over a baking sheet immediately after frying. This allows excess oil to drip away and air to circulate, preserving the crunch. Avoid stacking the pieces, as this traps moisture and softens the crust.
For more crispy delights, check out our recipe guide on crispy coatings and fried food techniques.
Common Mistakes and How to Avoid Them
Overcrowding the Pan
Overcrowding the pan is a common mistake when frying chicken. It not only lowers the oil temperature but also creates steam, which softens the crust. For perfect fried chicken, fry in small batches, leaving enough space between pieces for even cooking and proper crisping.
Not Monitoring Oil Temperature
Skipping a thermometer or neglecting to monitor oil temperature is a recipe for disaster. Without consistent heat, your chicken can turn out burned, greasy, or undercooked. Invest in a good thermometer and keep an eye on it throughout the frying process.
Skipping Resting Steps Before and After Frying
Letting your chicken rest after coating and before frying is essential. This resting period allows the coating to adhere better, preventing it from falling off in the oil.
Equally important is resting your chicken after frying. Letting the pieces cool slightly on a wire rack not only drains excess oil but also ensures the meat stays juicy and tender.
By avoiding these pitfalls and following the steps in this guide, you’ll master how to make perfect fried chicken. Up next, we’ll dive into serving and pairing tips to make your dish shine!
Serving and Pairing Your Fried Chicken
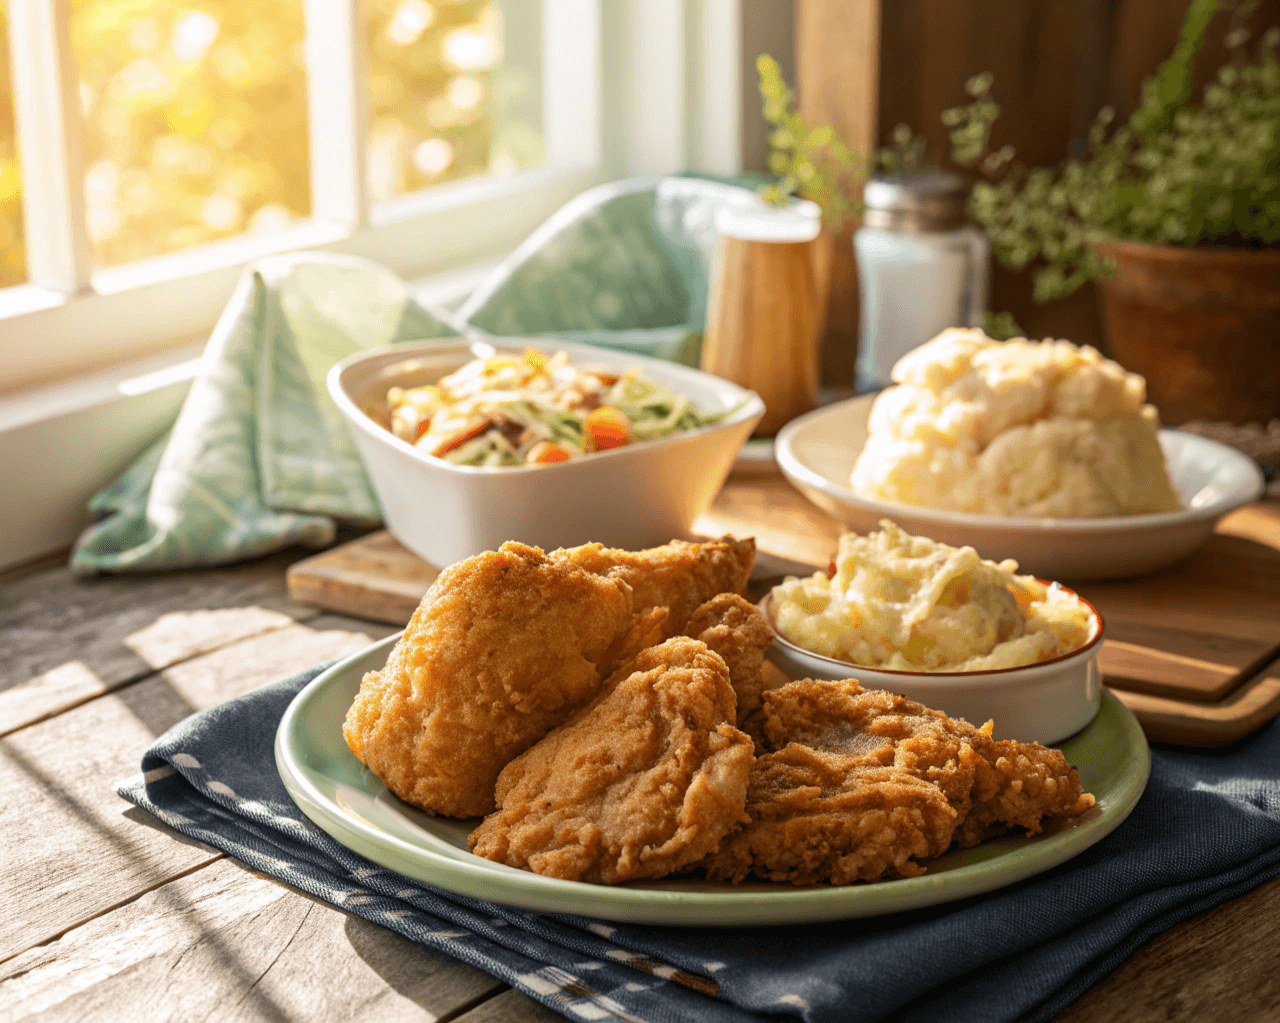
Perfect Side Dishes to Complement Fried Chicken
Fried chicken shines on its own, but the right sides can elevate the meal to a feast. Classic Southern-style pairings like fluffy buttermilk biscuits, creamy mashed potatoes, or buttery corn on the cob are always crowd-pleasers. For something lighter, a crisp coleslaw or a fresh garden salad balances the richness of the fried chicken.
If you’re hosting a gathering, offer a mix of savory sides like baked macaroni and cheese or collard greens. These comforting additions round out the meal and ensure everyone finds something to love.
Garnishes and Sauces to Enhance Flavor
Adding the right finishing touches can take your fried chicken from great to unforgettable. A drizzle of honey or a sprinkle of fresh herbs like parsley or thyme adds depth and color. For a spicier kick, serve with hot sauce, or try a tangy homemade ranch or honey mustard dipping sauce.
Pairing your chicken with sauces is also a chance to experiment with flavors. A smoky chipotle aioli or a zesty garlic yogurt dip can add a unique twist to your dish.
Pro tip: Present your fried chicken and sides on a large platter with garnishes for a restaurant-quality feel.
FAQs Section
How do I keep fried chicken crispy for hours?
To keep fried chicken crispy, place it on a wire rack set over a baking sheet instead of stacking it. If you’re preparing in advance, reheat in the oven at 375°F for about 10 minutes to revive the crunch without overcooking.
Why is my fried chicken greasy?
Greasy fried chicken usually happens when the oil temperature is too low. Maintain a steady 350°F, and don’t overcrowd the pan, as this drops the oil temperature. Properly draining the chicken on a wire rack also prevents excess grease.
Can I bake instead of fry to make it healthier?
Absolutely! For a healthier option, you can bake your chicken. Coat the chicken in a mixture of seasoned breadcrumbs and bake on a wire rack at 400°F until the internal temperature reaches 165°F. Spray the coating lightly with oil for extra crispiness.
What’s the best way to reheat fried chicken?
Reheat leftover fried chicken in the oven to keep the coating crispy. Preheat to 375°F, place the chicken on a wire rack, and heat for about 10-12 minutes. Avoid microwaving, as it makes the crust soggy.
By mastering how to make perfect fried chicken, you can create a dish that’s not only delicious but adaptable for any occasion. Enjoy your crispy creation!
Storing and Reheating Fried Chicken
How to Store Leftover Fried Chicken Properly
Storing your leftover fried chicken the right way ensures it stays fresh and delicious for another meal. Allow the chicken to cool completely before storing it to prevent condensation, which can make the coating soggy. Place the chicken in an airtight container lined with paper towels to absorb any excess moisture.
For short-term storage, keep it in the fridge for up to three days. If you want to store it longer, freeze the chicken. Wrap each piece tightly in aluminum foil or plastic wrap, then place them in a freezer-safe bag or container. This method helps preserve the flavor and crunch.
Best Techniques for Reheating Fried Chicken
Reheating fried chicken the right way is crucial for restoring its crispy coating and juicy interior. The oven is your best bet—preheat it to 375°F and place the chicken on a wire rack set over a baking sheet. Heat for about 10-15 minutes, depending on the size of the pieces, until the internal temperature reaches 165°F.
If you’re short on time, use an air fryer for a faster, equally crispy result. Avoid microwaving your fried chicken, as it often makes the coating chewy and soggy. By following these steps, you’ll enjoy a second helping that’s almost as good as the first!
Wrapping It All Up
Why Mastering Fried Chicken Matters
Fried chicken is more than just a meal; it’s a culinary tradition that brings people together. By following this step-by-step guide on how to make perfect fried chicken, you’ve learned how to create a dish that’s both timeless and satisfying. From selecting quality ingredients to mastering the frying process, every detail plays a role in achieving crispy, juicy perfection.
Experiment and Make It Your Own
Once you’ve nailed the basics, don’t hesitate to get creative. Try experimenting with different seasonings, marinades, or coatings to give your fried chicken a unique twist. You could even explore regional variations like Nashville hot chicken or Korean-style fried chicken for new flavors.
No matter how you choose to serve it, fried chicken is always a crowd-pleaser. Whether it’s a casual family dinner or a special occasion, your homemade creation will undoubtedly leave everyone asking for seconds.
Now that you’re equipped with all the tips and techniques, it’s time to put them into practice. Gather your ingredients, fire up the stove, and enjoy the process of making—and savoring—the perfect fried chicken!
This step-by-step recipe for how to make perfect fried chicken delivers crispy, golden chicken with a juicy interior. Perfect for any meal!
Print
Perfect Fried Chicken
- Total Time: 60 minutes
- Yield: 4 servings 1x
- Diet: Non-Vegetarian
Description
A step-by-step guide to making irresistible fried chicken that is crispy on the outside and juicy on the inside.
Ingredients
- 4 bone-in, skin-on chicken pieces (thighs, drumsticks, or wings)
- 2 cups buttermilk
- 2 cups all-purpose flour
- 1/2 cup cornstarch
- 1 teaspoon salt
- 1 teaspoon black pepper
- 1 teaspoon garlic powder
- 1 teaspoon onion powder
- 1 teaspoon smoked paprika
- 1/2 teaspoon cayenne pepper
- Vegetable oil (for frying)
Instructions
- Brine or marinate the chicken in buttermilk for at least 2-4 hours or overnight.
- Prepare the coating by mixing all-purpose flour, cornstarch, salt, pepper, garlic powder, onion powder, smoked paprika, and cayenne in a bowl.
- Remove chicken from marinade and let excess buttermilk drip off.
- Dredge chicken pieces in the seasoned flour mixture, then dip them back into buttermilk, and coat again with the flour mixture for double-dipping.
- Heat vegetable oil in a skillet to 350°F (175°C).
- Carefully place chicken pieces in the hot oil, frying in small batches for 12-15 minutes on each side or until the internal temperature reaches 165°F (75°C).
- Remove chicken and place it on a wire rack to drain excess oil.
- Let chicken rest for 5-10 minutes before serving.
Notes
For extra crispiness, consider adding a mixture of cornstarch or rice flour to the coating. Always ensure not to overcrowd the pan when frying.
- Prep Time: 30 minutes
- Cook Time: 30 minutes
- Category: Main Course
- Method: Frying
- Cuisine: Southern
Nutrition
- Serving Size: 1 piece
- Calories: 400
- Sugar: 2g
- Sodium: 600mg
- Fat: 20g
- Saturated Fat: 5g
- Unsaturated Fat: 10g
- Trans Fat: 0g
- Carbohydrates: 30g
- Fiber: 1g
- Protein: 25g
- Cholesterol: 100mg
Keywords: fried chicken, Southern cooking, comfort food, homemade chicken, crispy chicken