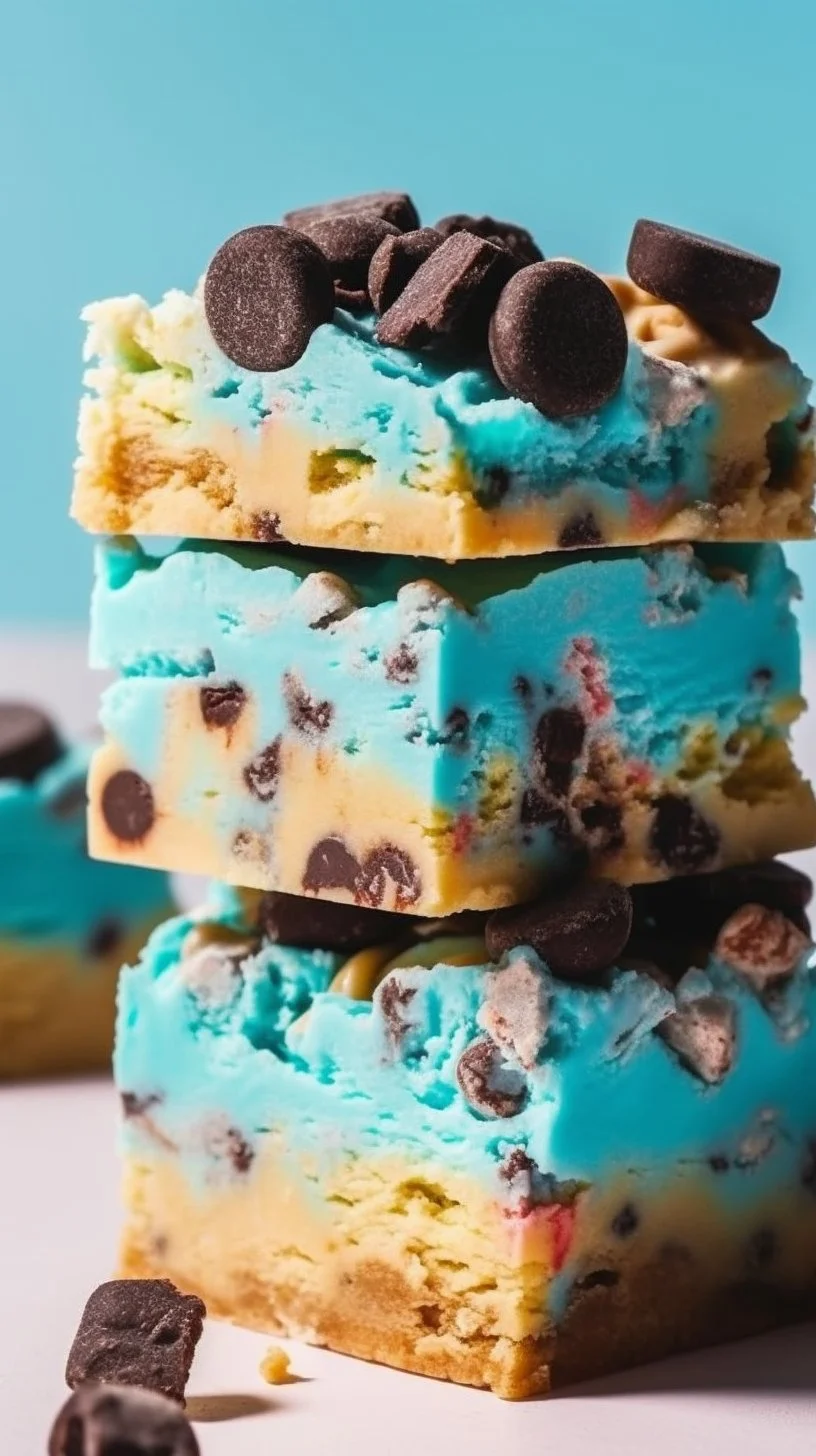
There’s something oh-so-special about gathering in the kitchen, the air filled with the sweet aroma of baked goods, all while sharing stories and laughter with loved ones. Today, I’m thrilled to share a recipe that takes me back to those cherished moments — Cookie Monster Cheesecake Bars. These delightful treats blend a rich cheesecake layer with a sweet cookie crust, sure to bring smiles and warmth to your table.
Why make this recipe?
These Cookie Monster Cheesecake Bars are a joyful twist on classic cheesecake and cookies, perfect for family gatherings, birthday celebrations, or just when you need a little pick-me-up. They’re not just dessert; they’re a celebration of simple pleasures. The soft, creamy filling and the chewy cookie crust create a delightful harmony of flavors that feels like a warm hug in every bite.
How to make Cookie Monster Cheesecake Bars:
Ingredients:
- 1/2 cup butter, softened
- 1/2 cup brown sugar
- 1/4 cup granulated sugar
- 1 1/4 cup all-purpose flour
- 1 teaspoon vanilla
- 1 cup semi-sweet mini chocolate chips
- 1/2 teaspoon salt
- 1 large egg
- 16 ounces cream cheese, softened
- 1 cup powdered sugar
- 1/3 cup sour cream
- 1 teaspoon vanilla
- 1 1/2 cups Cool Whip
- 1 teaspoon lemon juice
- Blue food coloring
- 12 mini Chip Ahoy chocolate chip cookies, chopped
- 12 mini Oreos, chopped
Directions:
- Start by preheating that oven to a warm 350 degrees, letting it know something delicious is coming its way. In a stand mixer, cream the softened butter, granulated sugar, and brown sugar together until it’s all fluffy and dreamy.
- Next, add the egg, vanilla, salt, and slowly stir in the flour, mixing until everything comes together like an old friend.
- Fold in those sweet mini chocolate chips, because let’s be honest, they are the magic touch.
- Line an 8×8 pan with parchment paper and spread that cookie mixture evenly across the bottom. Bake it for about 15 to 20 minutes, or until it’s golden and a little puffed up. Once it’s done, remove it from the oven and let it cool while you whip up the cheesecake layer.
- In a clean stand mixer, whip that softened cream cheese until it’s smooth like a summer breeze.
- Add in the sour cream, lemon juice, vanilla, and gradually sprinkle in the powdered sugar, mixing until delightful and fluffy.
- Carefully mix in blue food coloring, stopping once you reach that lovely “Cookie Monster” hue — your very own masterpiece!
- Gently fold in the Cool Whip until everything is well combined, then pour this luscious mixture over the cooled cookie crust in your pan.
- Sprinkle the chopped cookies on top, adding that extra crunch and sweetness.
- Cover it up and stash it in the refrigerator for at least 6 hours, or overnight if you can resist the temptation.
- When you’re ready to serve, slice those bars into squares and watch the smiles light up the room.
How to serve Cookie Monster Cheesecake Bars:
These bars are perfect served chilled from the fridge, but if you want to make them extra special, add a scoop of vanilla ice cream on top and drizzle with chocolate syrup. Share each delightful bite with friends and family — they’ll be begging for seconds!
How to store Cookie Monster Cheesecake Bars:
Keep these beauties tightly covered in the fridge, where they can last up to a week. Though I doubt they’ll stick around that long; they’re just too good to resist!
Tips to make Cookie Monster Cheesecake Bars:
- Ensure the cream cheese is truly softened for the smoothest filling.
- You can play with the blue food coloring to get your favorite shade — the more colorful, the merrier!
- For extra texture, consider adding crushed nuts to the cookie crust or the topping.
Variations:
Feeling adventurous? Swap out the mini cookies for your favorites, like Nutter Butters for a peanut butter twist, or mix in rainbow sprinkles for a fun, festive flair.
FAQs:
-
Can I freeze these bars?
Yes! Just wrap them tightly in plastic wrap and foil, and they’ll keep in the freezer for up to three months. -
Can I use regular-sized cookies instead of mini?
Absolutely! Just chop them finely and adjust the amount according to your preference. -
Is there a way to make these gluten-free?
Sure thing! Just substitute the all-purpose flour with a gluten-free blend and make sure your cookies are gluten-free as well.
Baking brings us together, and each bite of these Cookie Monster Cheesecake Bars is a sprinkle of love and joy. So gather your loved ones, create some sweet memories, and enjoy sharing these delightful treats. Happy baking, y’all!

Cookie Monster Cheesecake Bars
Ingredients
Method
- Preheat the oven to 350°F (175°C).
- In a stand mixer, cream the softened butter, granulated sugar, and brown sugar together until fluffy.
- Add the egg, vanilla, and salt, then slowly stir in the flour until combined.
- Fold in the mini chocolate chips.
- Line an 8x8 inch pan with parchment paper and spread the cookie mixture evenly across the bottom.
- Bake for 15 to 20 minutes or until golden and slightly puffed. Allow to cool.
- In a clean stand mixer, whip the softened cream cheese until smooth.
- Add the sour cream, lemon juice, vanilla, and gradually mix in the powdered sugar until fluffy.
- Carefully mix in blue food coloring until desired color is achieved.
- Gently fold in the Cool Whip until well combined.
- Pour the cheesecake mixture over the cooled cookie crust.
- Sprinkle the chopped cookies on top.
- Cover and refrigerate for at least 6 hours or overnight.
- Slice into squares and serve chilled, optionally topped with vanilla ice cream and chocolate syrup.