
A warm kitchen, a wooden spoon, and a window where the sun finds the counter — this Banana Pudding Cheesecake Creation tastes like Sunday afternoons and family stories. It’s simple, sweet, and full of the kind of comfort that hugs you from the inside. Let’s make a memory.
Why make this recipe
There’s a reason this dessert lives on tablecloths and memory boards: it blends two beloved Southern comforts — banana pudding and creamy cheesecake — into one slice of sentimental bliss. It’s perfect for potlucks, birthdays, or any day that needs a little extra sweetness and slow conversation.
How to make Banana Pudding Cheesecake Creation
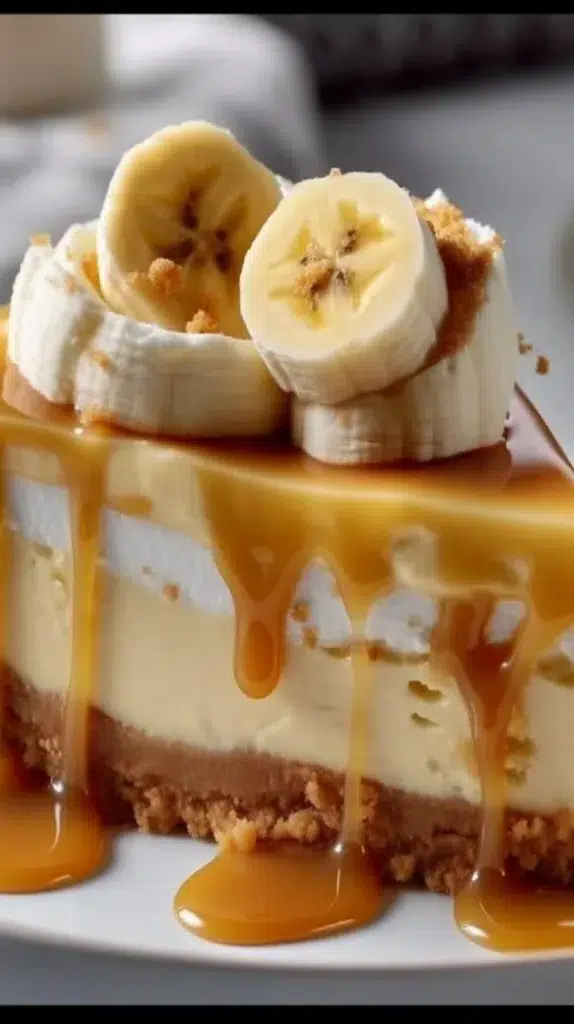
This recipe layers a buttery vanilla wafer crust with ripe bananas, creamy banana pudding, and a dreamy cream cheese topping. Take your time as you build it, smile at every layer, and remember that good desserts forgive a little imperfect slicing.
Ingredients:
- 2 ½ cups crushed vanilla wafer cookies
- 6 tablespoons unsalted butter, melted
- 2 tablespoons granulated sugar
- 2 cups cream cheese, softened
- 1 cup powdered sugar
- 1 teaspoon vanilla extract
- 2 cups whipped cream, divided
- 2 ripe bananas, sliced
- 1 cup banana pudding mix
- ½ cup milk
Directions:
- Preheat the oven to 350°F (175°C).
- In a mixing bowl, combine crushed vanilla wafers, melted butter, and granulated sugar. Mix until well combined.
- Press the mixture into the bottom of a springform pan to form the crust.
- In another bowl, beat the cream cheese, powdered sugar, and vanilla extract until smooth.
- Fold in 1 cup of whipped cream.
- In a separate bowl, mix banana pudding with milk and let it thicken.
- Layer sliced bananas over the crust, then pour the banana pudding on top.
- Pour the cream cheese mixture over the pudding and smooth out the top.
- Top with remaining whipped cream.
- Chill in the refrigerator for at least 4 hours before serving.
How to serve Banana Pudding Cheesecake Creation
Let the chilled cheesecake sit at room temperature for 10–15 minutes before slicing so the layers settle beautifully. Cut with a warm, clean knife for neat slices. Serve on a simple white plate with a sprig of mint or a few extra wafer crumbs for a homey touch.
How to store Banana Pudding Cheesecake Creation
Keep it covered in the refrigerator for up to 4 days. If you want to freeze slices, wrap them tightly in plastic wrap and place in an airtight container for up to 1 month; thaw overnight in the fridge before serving.
Tips to make Banana Pudding Cheesecake Creation
- Use ripe but firm bananas so they don’t turn mushy under the pudding.
- Press the crust firmly and evenly so the base holds together when you slice.
- For a silkier filling, make sure your cream cheese is fully softened before beating.
- Chill at least 4 hours, but overnight is even better — the flavors settle and sing.
Variations (if any)
- No-bake version: Skip the oven and press the crust, then chill layers as directed (see a no-bake take below in the conclusion).
- Boozy twist: Add 1–2 tablespoons of banana liqueur or bourbon to the pudding mix for grown-up warmth.
- Tropical: Fold in finely chopped pineapple or toasted coconut for a Southern island spin.
FAQs
Q: Can I make this cheesecake in advance?
A: Yes — in fact, it’s best when made a day ahead. The chilling time lets the layers meld and makes slicing neater.
Q: Can I use homemade banana pudding instead of the mix?
A: Absolutely. If using homemade pudding, make it slightly firmer so the cheesecake layers set well. Reduce extra liquid where needed.
Q: My bananas browned overnight. Will that affect the taste?
A: Browning doesn’t change the taste dramatically, but for the prettiest presentation, slice bananas just before layering or toss slices briefly in lemon juice to slow browning.
Q: Can I make this in a regular springform or a pie pan?
A: A 9-inch springform works best for neat slices, but a deep-dish pie pan will do in a pinch — just serve more rustic slices.
Q: Is there a gluten-free option?
A: Swap the vanilla wafers for gluten-free vanilla cookies and check labels on pudding mix — many brands offer gluten-free options.
Conclusion
If you want inspiration or a similar spin on this layered classic, I like the homey approach in the Banana Pudding Cheesecake – The Country Cook, which brings familiar flavors to the front porch table. For an easy, no-bake version that’s lovely when you need a simpler afternoon project, take a look at the No-Bake Banana Pudding Cheesecake – Buy This Cook That.
Thank you for letting me share this little Southern keepsake — bake it for company, for yourself, or for the quiet joy of carrying on family traditions. There’s always room at my kitchen table.
Banana Pudding Cheesecake Creation
Ingredients
Method
- Preheat the oven to 350°F (175°C).
- In a mixing bowl, combine crushed vanilla wafers, melted butter, and granulated sugar. Mix until well combined.
- Press the mixture into the bottom of a springform pan to form the crust.
- In another bowl, beat the cream cheese, powdered sugar, and vanilla extract until smooth.
- Fold in 1 cup of whipped cream.
- In a separate bowl, mix banana pudding with milk and let it thicken.
- Layer sliced bananas over the crust, then pour the banana pudding on top.
- Pour the cream cheese mixture over the pudding and smooth out the top.
- Top with remaining whipped cream.
- Chill in the refrigerator for at least 4 hours before serving.